
Introduction
Maintaining the integrity of brick walls is crucial for both aesthetic appeal and structural stability. Over time, cracks may develop in brick walls due to various factors, potentially leading to more significant problems if not addressed promptly. Repairing cracks instead of replacing entire sections not only saves money but also preserves the character of your home.
Understanding Brick Wall Cracks
Types of Cracks
Cracks in brick walls can generally be classified into two main categories: hairline cracks and structural cracks. Hairline cracks are minor surface issues that typically don’t compromise structural integrity but can allow moisture infiltration. On the other hand, structural cracks are usually larger and may indicate significant underlying problems that could jeopardize the stability of the structure.
Causes of Cracking
Several factors contribute to brick wall cracking, with the most common being the settling of the foundation. As soil shifts over time, it can cause the foundation to settle unevenly, leading to stress on the walls. Additionally, moisture issues—like water accumulation or leaks—can cause bricks to expand and crack. Temperature changes, too, can lead to thermal expansion or contraction of the brick material, resulting in cracks appearing over time.
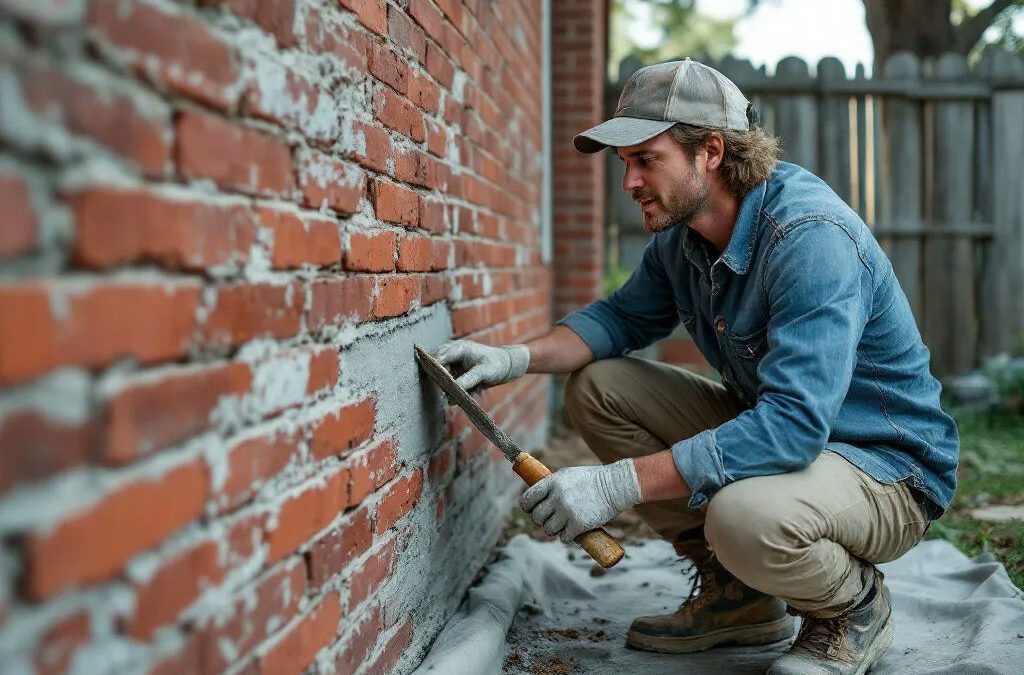
Tools and Materials Needed
Essential Tools
Before you start your repair, gather the necessary tools to ensure the process goes smoothly. A trowel and chisel are essential for digging out damaged mortar and filling cracks. A wire brush will help clean old mortar from the joints, and a paint scraper can be useful for removing any loose debris.
Recommended Materials
When it comes to materials, selecting the right mortar is crucial, as its type and color should closely match your original bricks. Brick fillers or sealants help in filling cracks and sealing them against moisture. Don’t forget to equip yourself with safety gear—gloves, goggles, and masks—to protect yourself from dust and debris during the repair process.
Preparing for Repair
Assessing the Damage
Before beginning any repairs, it’s vital to assess the extent of the damage. Take note of the types of cracks—hairline or structural—and determine whether there are any underlying issues, such as moisture intrusion or foundation settling that need to be addressed first. It’s best to make thorough notes on the condition of the bricks and mortar joints for accurate repairs.
To learn more about assessing damage and other foundational concerns, visit our guide on what to expect during a commercial concrete installation project.
Cleaning the Area
A successful repair hinges on proper preparation, which starts with cleaning the area. Use your wire brush to remove any loose debris, old mortar, or crumbling bricks from the cracks. A clean surface is crucial for effective adhesion of new materials, ensuring that repairs last longer and perform better.
Repairing Cracked Brick Walls
Filling Hairline Cracks
To fill hairline cracks, follow a simple step-by-step process. First, clean the cracks completely with a wire brush. Next, apply a suitable brick filler or sealant directly into the cracks, ensuring it penetrates deeply. After filling the crack, smooth the surface for a clean finish and consider adding a waterproof sealant to prevent moisture infiltration in the future.
Need help choosing the correct materials? See our article on how to choose the right concrete mix.
Repairing Structural Cracks
Repairing structural cracks may require more comprehensive work, including replacing damaged bricks. If the damage is extensive, carefully remove the damaged bricks and replace them with new ones that match the existing wall. After replacing any bricks, repointing the mortar joints is necessary to restore the integrity of the repair. Fill larger cracks with a mortar mix, ensuring a solid bond is achieved.
Learn more about the importance of reinforcement in deep structural repairs.
Finishing Touches
Cleaning Up
Once repairs are complete, focus on cleaning up the area. Remove any excess mortar or filler that may have squeezed out during the application process. Conduct a final inspection to ensure all cracks are filled properly and that the surface appears uniform and clean.
For a complete checklist before any large job, see our pre-pour checklist guide.
Preventative Measures
To prevent future damage, consider applying a sealant over the repaired areas to provide an additional layer of protection against moisture. Regular maintenance is key—implement a routine of cleaning the bricks and inspecting for new cracks or signs of wear. This early detection can help mitigate further damage to your brick walls.
Be sure to avoid common errors—see our list of the top 7 mistakes to avoid when maintaining your structures.
Conclusion
Repairing cracked brick walls is a manageable task that can significantly extend the life of your home’s exterior. Regular maintenance not only promotes a visually appealing structure but also safeguards it against severe deterioration. If you find yourself unsure about the extent of repairs or need assistance, don’t hesitate to call us at (916) 562-2345 for a personalized quote and expert guidance on getting the job done right.
Additional Resources
- Differences Between Residential and Commercial Concrete
- Key Safety Measures for Commercial Concrete Pours
- How Contractors Can Profit from Concrete Jobs
- How Weather Affects Concrete Pours
- Understanding Curing Times
