I. Introduction
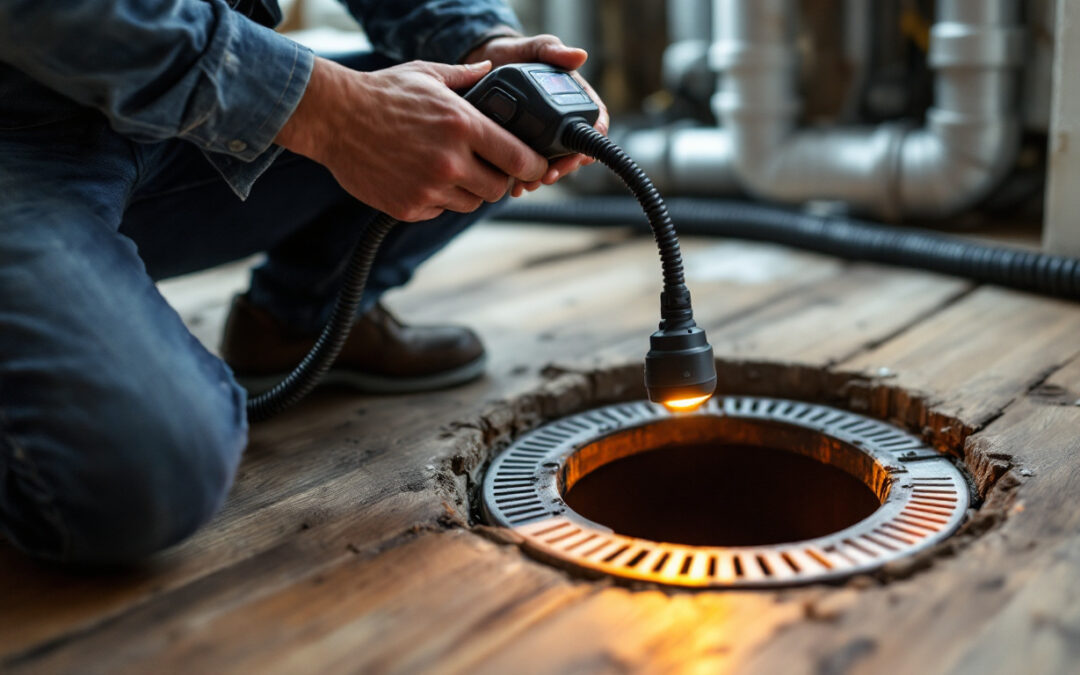
Draining issues can escalate quickly, leading to significant damage if not addressed promptly. Therefore, maintaining an efficient drainage system in your home is crucial for both emergency and preventive services. For DIY homeowners, investing in a drainage inspection camera provides a straightforward solution to identify and resolve potential problems before they turn serious.
Using an inspection camera allows you to assess your drainage system without the need for costly professional services. These cameras facilitate thorough inspections, enabling homeowners to visualize issues that are otherwise hidden from sight. In this article, we will uncover some of the best drainage inspection cameras available, focusing on features that cater to the DIY enthusiast.
II. What to Look for in a Drainage Inspection Camera
A. Camera Resolution and Image Quality
When selecting a drainage inspection camera, prioritize high resolution and image quality, as this affects your ability to identify issues accurately. A camera with at least 1080p HD resolution provides clear images, making it easier to spot clogs, cracks, or blockages in the pipes. Look for models that also feature adjustable resolution settings for various scenarios.
B. Cable Length and Flexibility
The cable length is crucial for reaching the depths of your drainage system. Consider a camera with a long and flexible cable that can navigate bends and turns in the plumbing. A minimum length of 30 feet is ideal for most residential applications, enabling you to inspect longer runs without difficulty.
C. LED Lighting Options
Proper lighting is essential for effective inspections. Cameras equipped with built-in LED lights assist in illuminating dark spaces within pipes, enhancing image clarity. Opt for models that offer adjustable brightness levels to accommodate varying conditions and improve visibility.
D. Waterproof and Durable Construction
Given that these cameras will be used in wet environments, it’s essential to choose a model that is waterproof and constructed from durable materials. Look for cameras with a robust housing material that can withstand the rigors of drainage inspections while preventing water damage. A sturdy build also prolongs the camera’s lifespan.
E. Compatibility with Smartphones or Tablets
Many modern drainage inspection cameras offer smartphone or tablet compatibility, providing convenience and versatility. This feature allows you to view live footage directly on your device, making it easier to record findings and share them with others. Check for apps that enhance usability, offering additional functions like real-time video sharing.
F. Recording and Storage Capabilities
A camera that allows for recording video or capturing images is invaluable for documentation and future reference. Look for cameras with expandable storage options such as microSD cards. This enables you to retain records of your inspections, aiding in tracking recurring issues and demonstrating problems to professionals if needed.
III. Top Features of the Best Drainage Inspection Cameras
A. Real-Time Video Streaming
Real-time video streaming is a sought-after feature that allows homeowners to observe conditions within the drainage system as they inspect. This smooth, live feed offers immediate insights and helps in making informed decisions while troubleshooting drainage problems.
B. High-Definition (HD) Video Quality
The clarity provided by HD video quality cannot be understated. Cameras that offer HD capability ensure that even the smallest details are visible, helping to diagnose issues with precision. This feature is particularly critical when identifying potential blockages or fractures.
C. Adjustable Focal Length
An adjustable focal length is useful for inspecting various aspects of drainage systems. This allows the user to zoom in on specific areas of concern or to view broader sections when necessary. Cameras equipped with this feature enhance flexibility, making it easier to capture the required details.
D. Wi-Fi or Bluetooth Connectivity
Wi-Fi or Bluetooth connectivity enhances the functionality of inspection cameras by allowing users to connect directly to mobile devices. This feature enables greater ease in sharing footage and collaborating with others or consulting with professionals for advice.
E. User-Friendly Interfaces
A user-friendly interface is vital for both seasoned and novice users. Cameras with straightforward controls and intuitive menus reduce the learning curve and facilitate smoother operation. Opt for models that include clear instruction manuals or on-screen prompts.
F. Price Point and Warranty Considerations
Evaluate the price point relative to the features offered, as not all expensive models guarantee superior quality. Ensure the camera comes with a warranty, providing peace of mind and protection against defects after purchase. This can often be a deciding factor in your purchasing decision.
IV. Reviews of the Best Drainage Inspection Cameras
A. Camera 1: Depstech Wireless Endoscope
The Depstech Wireless Endoscope is highly rated for its impressive 1080p HD video quality, making it a favorite among homeowners. Pros include easy connectivity to smartphones and a flexible cable that reaches up to 33 feet. However, cons may include occasional connectivity issues reported by some users. This camera is perfect for quick inspections and home plumbing projects.
B. Camera 2: Ryobi P788 18V One+
Known for its rugged design, the Ryobi P788 features a durable build and excellent waterproof capabilities. Pros include high-definition video and a 3.5-inch LCD screen for real-time viewing. Conversely, cons might be its higher price point compared to other models. It is ideal for homeowners with frequent drainage inspections or those who need a reliable, heavy-duty option.
C. Camera 3: HOMFUL Inspection Camera
The HOMFUL Inspection Camera offers versatility with its adjustable focal length and the capability to record video. Pros include great image clarity and a flexible, long cable. Users have noted cons related to the battery life, which may limit usage during extended inspections. This camera is best for detailed exploratory work within complex drainage systems.
D. Camera 4: TOOLEAGUE Wireless Endoscope
The TOOLEAGUE Wireless Endoscope stands out for its ease of use and effective LED lighting. Pros include a user-friendly design and compatibility with various devices. However, some users have pointed out cons about the depth that the camera can effectively reach. It is well-suited for casual homeowners looking to inspect drains and culverts without advanced features.
V. Comparing the Best Drainage Inspection Cameras
A side-by-side comparison table of the mentioned products would reveal distinct features, helping users to identify which camera best fits their needs. When assessing cost versus features, note that while some cameras offer extensive capabilities, others may provide essential functions at a lower price point. Recommendations may vary based on specific requirements, such as budget constraints or the complexity of drainage issues.
VI. How to Use a Drainage Inspection Camera
A. Step-by-Step Guide for Effectively Using the Camera
-
Preparation and Setup:
Before beginning, ensure your inspection camera is fully charged and the cable is untangled and free from damage. Read the user manual to familiarize yourself with the controls, display features, and any mobile app connectivity. Make sure you have clear and safe access to the drain or pipe entry point. -
Inspection Process:
Gently feed the camera into the drain, guiding the cable steadily and slowly to avoid sudden jerks or damage. Watch the live feed on your screen or mobile device as the camera advances. Use the built-in LED lights to improve visibility, and adjust brightness as needed. Rotate or maneuver the camera head carefully to get a full view of the inner pipe walls. -
Analyzing and Interpreting Results:
As you inspect, take note of any irregularities such as corrosion, cracks, roots, debris buildup, or blockages. Use the camera’s capture or record function to save footage for later review. After removing the camera, replay and examine the recorded material in detail to identify problem areas and plan further actions—whether it’s a DIY fix or calling a professional.
B. Safety Precautions and Best Practices
-
Wear protective gear: Use gloves to prevent contact with contaminants, and wear safety goggles to shield your eyes from splashes or debris.
-
Ensure a clean workspace: Keep the area around the drain dry and free of trip hazards. If you’re working outdoors, make sure weather conditions are safe.
-
Handle the camera with care: Don’t force the camera through tight bends or obstructed sections. Doing so can damage both the cable and the pipe.
-
Disinfect after use: Clean the camera thoroughly after each inspection, especially if it came into contact with wastewater or sewage.
-
Keep records: Store videos and images from inspections in a dedicated folder. These can be useful for monitoring changes over time or providing evidence to a plumber if needed.
Using a drainage inspection camera safely and correctly not only protects your equipment and plumbing—it also ensures your inspection is effective and informative.
VII. Conclusion
Drainage inspection cameras empower homeowners to take charge of their plumbing maintenance with confidence and accuracy. By choosing the right camera and following proper usage techniques, you can spot issues early, avoid costly repairs, and keep your drainage system running smoothly. Safety and preparation are key, so always follow best practices during inspections. With the right tools and knowledge, even complex plumbing problems become manageable.