I. Introduction
Maintaining brickwork is crucial for preserving the structural integrity and aesthetic appeal of your home. Damaged mortar can lead to serious issues, including moisture problems and compromised stability. Recognizing the signs of mortar damage and understanding the removal process can help you take proactive measures.
II. Understanding Mortar Damage
A. Common Causes of Mortar Degradation
Mortar degradation is primarily caused by various environmental and structural factors. Weather conditions, such as freeze-thaw cycles, can lead to cracks and disintegration. Additionally, water intrusion can weaken mortar, while structural movement can create stress that exacerbates damage.
B. Types of Damage
Common types of mortar damage include cracking, spalling, and loss of adhesion. Cracking occurs when mortar joints shrink or expand due to temperature changes. Spalling, or the flaking and chipping of mortar, often results from prolonged exposure to moisture, while loss of adhesion could indicate a failure of the bond between the brick and the mortar, leading to further deterioration.
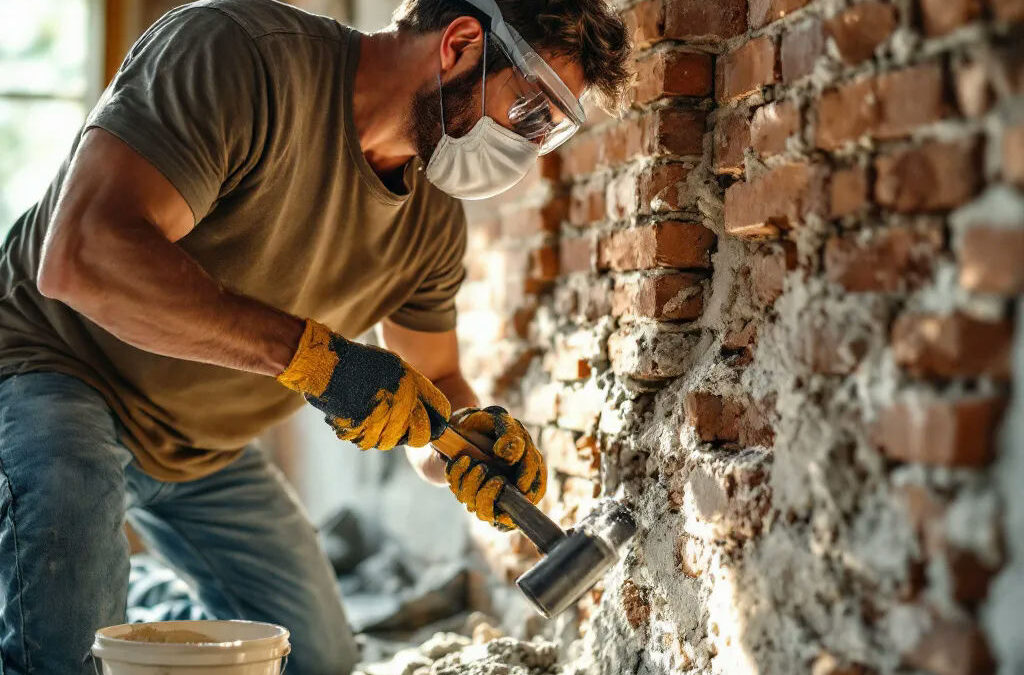
III. Tools and Materials Needed
A. Essential Tools
To effectively remove damaged mortar, certain essential tools are required. A hammer and chisel are traditional tools that allow for precise removal of mortar from brick joints. Alternatively, a mortar rake can be used for a more efficient and controlled process, especially in tight spaces.
B. Safety Equipment
Safety should always be a priority. Wearing gloves protects your hands from sharp debris and tools. Safety goggles will shield your eyes from flying particles, and a dust mask will help reduce inhalation of dust created during the mortar removal process.
C. Cleaning Supplies
Cleaning the work area before and after is essential. Brushes can help remove loose debris and dust from the brick surface, while a vacuum cleaner can effectively collect any remaining particles, ensuring a clean and safe working environment.
IV. Preparatory Steps
A. Assessing the Extent of Damage
Before beginning any mortar removal, it’s important to assess the extent of the damage. Look for widespread cracking, deep spalling, or areas where the mortar is peeling away from the brick. This evaluation will inform the tools needed and the repair process that follows.
B. Cleaning the Brick Surface
Starting with a clean surface makes the removal process smoother. Use a stiff brush to clear away dirt and dust, ensuring that you have a clear view of all damaged areas. This step not only helps with visibility but also makes it easier to identify all the spots requiring attention.
C. Protecting Surrounding Areas
To prevent damage to surrounding brickwork or landscaping, cover adjacent areas with protective tarps or plastic sheeting. This precaution is especially important if you’re using power tools, as debris can scatter unpredictably during the removal process.
V. Step-by-Step Guide to Removing Damaged Mortar
A. Traditional Methods
Using a hammer and chisel is a time-tested method for removing mortar. Begin by carefully chipping away at the damaged areas, working slowly to avoid disturbing the surrounding brick. Additionally, utilizing a mortar rake can make the job easier and more efficient for larger areas.
B. Power Tools for Efficiency
For a quicker method, power tools like an angle grinder can significantly speed up the removal process. When using this tool, it’s crucial to follow safety guidelines, such as angling the grinder away from yourself and keeping a firm grip to maintain control. Start with a low speed to prevent damaging the bricks and increase as necessary.
C. Best Practices to Minimize Brick Damage
To minimize the risk of damaging the surrounding bricks during removal, focus on small sections at a time. Avoid excessive force, and listen for sounds that could indicate you’re damaging the brick itself. Patience is key; rushing the removal can lead to costly repairs later.
VI. Post-Removal Process
A. Cleaning Joints After Mortar Removal
Once the damaged mortar is removed, clean the joints thoroughly. Use a vacuum or compressed air to eliminate dust and debris trapped within the joints, ensuring optimal adhesion for the new mortar. Proper cleaning prevents future mortar failure due to debris contamination.
B. Inspecting for Remaining Damage
After cleaning, inspect the bricks for any remaining damage or cracks. Address any minor issues before applying new mortar to ensure a long-lasting repair. This inspection might include checking for loose bricks or additional spalling that wasn’t initially visible.
C. Preparing for New Mortar Application
Before applying new mortar, ensure the joints are completely dry and that any loose particles have been removed. Preparing the area properly will enhance the adhesion of new mortar and provide the best results in terms of durability and aesthetics.
VII. Repointing and Repairing Brick Joints
A. Choosing the Right Mortar Mix
Selecting the right mortar mix is crucial for successful repointing. Factors to consider include the climate, exposure to moisture, and the type of bricks being used. Typically, a mix of Portland cement, lime, and sand is recommended for optimal results. To learn more about concrete mix options, visit our guide on How to Choose the Right Concrete Mix for Your Commercial Project.
B. Application Techniques
When applying new mortar, use a tuckpointing tool or a pointing trowel to carefully fill the joints. Ensure the mortar is compact and smooth to match the surrounding bricks. Proper application techniques will help maintain the integrity and aesthetic of the brickwork. For related topics, check out Top 7 Mistakes to Avoid in Commercial Concrete Construction.
C. Curing Time and Process
After applying new mortar, allow adequate curing time as per the manufacturer’s instructions. Typically, this may range from a few days to a week, depending on conditions. During this period, ensure the joints remain moist to prevent cracking as the mortar sets. Learn more on Understanding Curing Times for Commercial Concrete Projects.
VIII. Preventative Maintenance Tips
A. Regular Inspections
To prevent future mortar damage, conduct regular inspections of your brickwork. Look for cracks or spalling and address them promptly to avoid larger repair costs down the line. Regular maintenance can extend the lifespan of your brickwork significantly. Tips can also be found in our guide on What to Expect During a Commercial Concrete Installation Project.
B. Sealing Bricks and Mortar
Applying a sealant to bricks and mortar can provide added protection against moisture intrusion. A high-quality sealant will reduce the porosity of the materials, keeping water and other harmful elements at bay. This proactive measure contributes to long-term durability.
C. Addressing Water Drainage Issues
Ensuring proper water drainage around your brick structure is vital to prevent mortar damage. Install gutters and downspouts that direct water away from the foundation, and fill any low-lying areas surrounding the structure to enhance drainage. Discover more about preventative planning by reading about our Pre-Pour Checklist for Large Commercial Concrete Jobs.
IX. Conclusion
Proper mortar maintenance is crucial for preserving your home’s structural integrity and appearance. By identifying damage early and following the removal techniques outlined above, you can prevent costly repairs down the road. Regular inspections and addressing water drainage issues will extend the life of your brickwork significantly.
Don’t let damaged mortar compromise your property’s value or safety. Folsom Lawn Service offers expert brick and mortar repair alongside our comprehensive landscaping solutions. Contact us today for a free assessment and quote. Our skilled team will ensure your brick structures remain beautiful and sound for years to come.